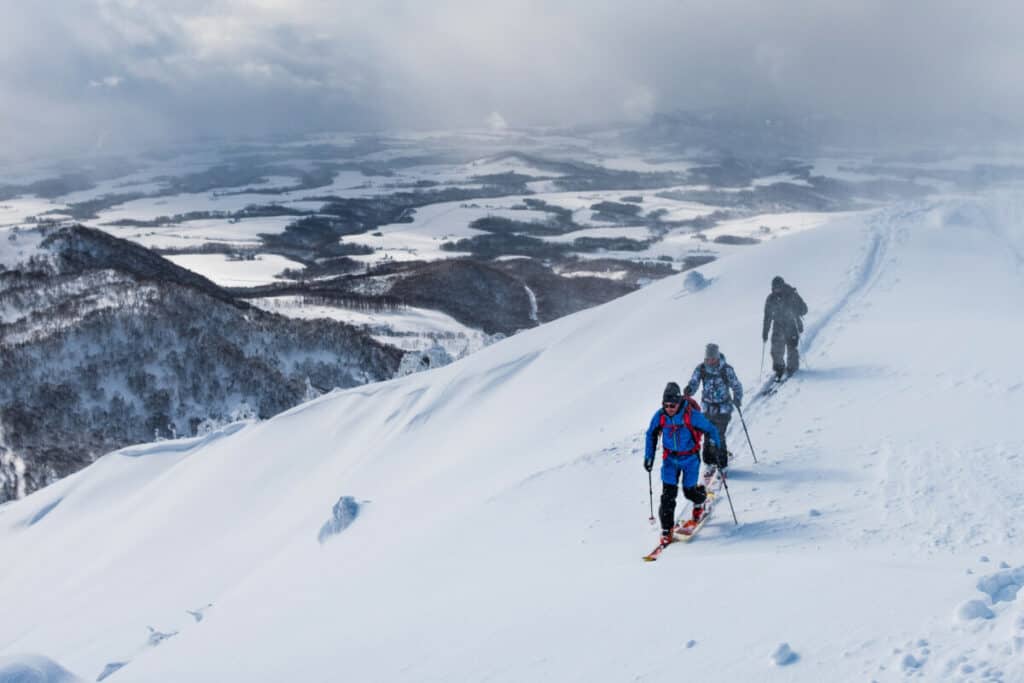
It is just as important to have reliable access to water during the winter months as it is during the summer. However, hydration is often overlooked when planning a ski trip, snowshoe hike, or backcountry tour. A frozen water bottle or hydration hose can unexpectedly prevent access to water. Harsh freezing temperatures can potentially jeopardize the health and safety of someone who is unprepared.
It can be extremely frustrating to be unable to drink water that is literally carried in hand.
The scary fact is that dehydration can cause the body to shut down hard and fast. For someone isolated in deep snow-covered terrain, dehydration can be dangerous. Isolation in the deep snow does not necessarily mean being miles away in the middle of nowhere, it can be just barely out of ear-shot.
To create a reliable easy-to-access source of water for skiing or backcountry/cross country touring, first calculate the amount of water that will be needed. Second, assess weather conditions. And third, create a hydration system that will not be subject to freezing or failure.
Creating a hydration system can be tricky. Not all methods of carrying water in winter weather are suitable for all conditions. How much water to bring and what temperatures to expect can influence how the water should be carried to prevent it from freezing.
Keep reading to find answers to common questions about hydration and carrying water in the winter.
How Much Water to Bring for Backcountry Skiing, Crosscountry Skiing, Winter Hiking, or Snowshoeing?
Before jumping into a discussion about how much water to bring and what to bring it in, it is important to mention that every winter tour starts with making sure that there is extra water stored in the vehicle. Get into the habit of bringing extra water. Sounds like a no-brainer. But believe me, the one time you’ll forget will be the one time you need it most.
To determine how much water to bring on a cross-country or backcountry ski tour, a general rule of thumb is to bring ½ liter (16 oz) of water for every hour of strenuous travel. This amount can vary according to body type, outside temperature, and the exertion demands of the activity.
However, the longer the tour, the more important it is to have enough fluids.
Using the 16oz rule of thumb as a guideline, measure and take careful note of the amount of water that is used on shorter tours. I’d rather run out of water or have an issue with my hydration system on a short tour than on a long one.
Figuring out what works best for short tours will give you a good idea of how much to bring on longer tours. Keep in mind , it is preferable to have too much water than not enough. But that being said, fluids are heavy and it is not ideal to carry extreme excess.
Because determining how long a tour will take, and, subsequently, determining how much fluids to bring has so many variables, continual self-assessment is critical.
For me and my typical pace, the 16oz rule of thumb generally holds true when I’m backcountry skiing. I’m 200 lbs and it usually takes me about one hour to either cover 4 miles (6.5 Kilometers) of low elevation gain touring (with easy snow), or one hour to ascend 1000 vertical feet (300 meters) of non-technical terrain. I consider elevation gain “non-technical” if I don’t have to take my skis off for a booter, hike or tour with crampons or climb with a rope or an aid.
For example, If my summit or halfway destination is 2000 vertical feet (600 meters) and 2 miles (3.25 Kilometers), the overall tour will take about 2 to 2.5 hours (assuming the return is all downhill). Subsequently, I will usually consume about a liter of fluids (around 32 ounces) round trip.
It is also important to factor in water consumption needs for the estimated time to be spent with little exertion. This could translate to another 4 to 8 ounces of water per hour and could include the amount of time the return downhill portion of the tour will take.
Temperature Can Determine What Kind of Hydration System to Use for Backcountry Skiing
Every backcountry tour requires close observation of weather and temperature. Knowing what kind of weather to expect and gearing up accordingly is essential for effective backcountry travel planning–not only influencing what kind of apparel and layers to bring (to stay adequately warm and dry), but also influencing the assembly of a proper hydration system. Colder temperatures will require additional measures to ensure fluids can be consumed without running into issues with freezing.
For example, on a backcountry tour where I expect temperatures to be at or around freezing. I’ll typically bring an insulated CamelBak with an insulated hose. If things chill more than expected, I’ll blow air back into the tube and run the insulated hose under my collar after each use to keep the hydration nipple from freezing.
A CamelBak, or equivalent, can be convenient and can be a preferred method for carrying fluids. However, colder sub-zero temperatures may require a more reliable hydration system.
On colder days, I’ll keep most of my fluids in a 32 ounce Nalgene water bottle insulated in the middle of my pack and another 8 to 16 oz screw top bottle in an accessible pocket. More on this below. . .
I use these examples to demonstrate that the expected weather conditions of a tour can greatly impact how fluids are to be stored and carried and what types of fluids to bring.
Bottom line: Knowing the weather will help you plan a hydration system that will offer no-compromise access to fluids.
How to Keep Water from Freezing While Backcountry Skiing?
There are several different types of hydration containers that can be used when skiing, snowshoeing, winter hiking, cross-country skiing, or backcountry skiing: standard water bottles, vacuum-sealed flasks, bladders (water reservoirs), and soft-flask containers. Below, I explain how they can be used on a backcountry ski tour and how to keep them from freezing.
How to keep a CamelBak hydration reservoir from freezing?
- Add an insulated bladder hose to the CamelBak to help prevent ice from forming in the hose and nipple.
- Instead of letting the end of the water reservoir’s tube and nipple remain exposed in its normal fashion, tuck the end of the hose under the collar so that it is nestled against bare skin. This will allow body heat to keep it thawed.
- Fill the water bladder with warm water and place in an insulated pack or cover. The warm water will take a much longer time to become subject to freezing and will help melt ice that forms in the hose and nipple.
- After drinking, blow air back into the hose to push all the water in the nipple and hose back into the bladder. This is a highly effective way to prevent water in the hose or nipple from freezing. The hard part is remembering to do so after every use. Forgetting, even once, can be very frustrating, as the nipple and tube may freeze solid with ice.
- If excessive air accumulates in the bladder, lean down to force the air to the bottom of the bladder–take a big puff from the nipple to suck the excess air out of the bladder.
- Place the bladder in a very thin and comfortable pack and put it on under the mid/outer layers of clothing. Keep the hose and nipple under the mid layer and run the hose over the shoulder. The hose and nipple should be kept under the mid layer when not in use. The body’s warmth will prevent ice buildup. It may seem weird to wear a pack under another pack, however, it becomes unnoticeable after just a few minutes and is extremely effective at keeping the entire bladder system from freezing since it is warmed by the body.
*My personal preference is to avoid the CamelBak (or equivalent), when temperatures are below 20°F (-4 °C). In the past, I’ve dealt with water freezing solid in the hose and nipple, a hose popping off from its bladder coupler, a hose cracking near the nipple. . .To me, the CamelBak is a “complicated” hydration system that seems to be more subject to problems in colder and colder temperatures. As temperatures become more extreme, I tend to simplify the mechanics of my hydration system in tandem.
How to Keep a Water Bottle from Freezing?
- Fill the water bottle with hot water. The hot water will significantly extend the amount of time that it will take to chill and freeze.
- Add electrolyte drink mix, like Vitalyte, or Skratch Labs, or even Gatorade powder to add flavor, replace electrolytes and reduce freezing temperature.
- Store the water bottle upside down to reduce the tendency of water freezing at the mouth opening.
- Place the water bottle in an insulated sleeve or wool sock–to add insulation.
- Store the water bottle inside the mid portion of the pack for best insulation.
- The 32oz Nalgene HDPE water bottle is bomber proof and is what I use in the backcountry.
- The Hunersdorf wide-mouth bottle (sorry, no Amazon link) is also a go-to backcountry item specifically made for extremely cold temperatures.
The Insulated Thermos is the Most Effective Way to Keep Water from Freezing, Albeit Heavy.
- The insulated thermos is probably the best failsafe way to prevent fluids from freezing during winter backcountry travel. Sometimes they are also used to pack fluids such as hot tea, miso soup, coffee, and/or other fluids to rejuvenate core temps and provide/replace energy and/or electrolytes.
- Most insulated thermoses are vacuum sealed, made out of stainless steel and are fairly durable.
- One of the issues with the insulated thermos in the backcountry is weight. A thermos all by itself can weigh around a pound. Backcountry skiing or backcountry travel, in general, is gear-heavy. Most setups are focused on shaving weight wherever possible and the extra weight of an insulated thermos is often viewed as excessive.
- However, when it comes to the insulated thermos, the 32oz Hydroflask and the 32oz CamelBak both weigh about 15 oz and are a couple of the lightest out there. Compare these to the 32oz Nalgene HDPE bottle weighing just 3.75 oz.
Packing an insulated thermos is a tradeoff on weight.
*Both the standard water bottle and the insulated thermos also bring up an issue with storage. Large fluid containers are usually stuffed into the pack to help with insulation and to prevent them from bouncing out of a side pocket during a downhill descent. It can be quite cumbersome to shell off the pack every time hydration is needed. Typically, I will carry a 32oz Nalgene water bottle in my pack and a smaller 8-16oz Nalgene in an easy-to-access pocket (preferably insulated). I will only need to shell off the pack once every hour or so during the ascent to refill the smaller container.
Soft Flask:
- Insulated soft-flask water bottles are lightweight, they offer versatility with their stowage capabilities–like in a pocket, and they collapse down to almost nothing. Some backcountry skiers wear an insulated soft-flask holder on their pack’s shoulder strap with a draw straw. Accessing hydration doesn’t get any easier than merely turning your head to the side and sucking from a straw.
- When mounted on the shoulder the draw tube remains in a vertical position allowing water to drain back down into the main reservoir to detour freezing in mild below-freezing temperatures.
- Many skimo racers and cross-country skiers use soft-flasks for their hydration because of their lightweight and versatility.
*Though the soft-flask is more durable than it looks, it may not be the best water container to use if your activity is likely to involve a crashlanding or two after missing the stomp off a kicker.
**When it comes to colder temperatures, the soft-flask doesn’t meet my personal need for bomber-proof durability and reliability.
What to Add to Water to Keep It From Freezing?
An electrolyte drink mix, like Vitalyte, Skratch Labs, or even Gatorade powder not only adds flavor to water, it can replace electrolytes and reduce freezing temperature–by how much though is uncertain.
What Kind of Water Bottle Lid is Best for Skiing In Cold Weather?
There are tons of different kinds of lids that cap the top of your favorite water bottle: spout-lid, nipple-lid, push-pull cap lid, flip-top lid, compression-top lid, sports-cap with a nozzle lid, wide-mouth-screw-top lid, small-mouth-screw-top lid, flip-top-nozzle-and-straw lid, etc.
All of these lids may seem to be simple in nature. However, any time water has to travel around a small corner, through a small opening, or up around and through a gadgety flip top, some lids can be much more subject to freezing and failure.
When it comes to carrying water in cold weather, simple is better. Wide-mouth screw-tops, such as: the 32oz Nalgene HDPE, the 32oz Nalgene Tritan, or the Hunersdorf wide-mouth water bottles are the go-to options for many backcountry enthusiasts who demand failsafe water access in the backcountry.
They are see-through containers that make it very easy to keep track of how much water is being consumed. Their lids are able to create a very reliable seal even in very cold temperatures. And, the water in a large-mouth container is able to better resist freezing as it never has to travel through or remain stagnant in narrow openings.
If you are willing to pack the extra weight, a wide-mouth vacuum-sealed thermos is a fantastic choice. Simple, durable, and insulated.
My only suggestion with screw-tops is to make sure that the lid has a fastener that mounts directly to the container. Losing a lid in a deep powder abyss is no bueno. Also, make sure you are firm footed when drinking from a large-mouth-screw-top lid. You definitely don’t want to be out in the middle of nowhere, halfway back from a sufferfest climb, slogging through warming snow–only to trip while attempting to quench your thirst, dropping your water bottle and spilling all your remaining fluids. Not that I’ve actually run into that exact scenario or anything. . .but it is also no bueno.
Lastly, avoid water bottles with a straw. Or at least, take the straw out. Elevation change while touring can force fluids out of straw-equipped water bottles and they can leak all over. Been there, done that too. Except it wasn’t water, it was Gatorade–which can be a nightmare to clean up inside a pack.
My personal go-to in mild cold temperatures is a push-pull cap lid mounted on an 8oz water bottle and stored in an easy-to-access pocket. It requires just one hand and my teeth to open. However, in colder temperatures, the best lid that will be least susceptible to freezing issues is the large-mouth screw-top lid.
Key Takeaways:
When it comes to touring in cold weather, the number one priority is to have a water hydration system that is bomber proof and reliable. In mild cold temperatures, I like the convenience of the water reservoir and the soft-flask. However, in colder temperatures, I’m more concerned about durability, reliability, and water-freeze prevention. In these areas, nothing can beat the Nalgene HDPE or Hunersdorf water bottles. If I’m worried about them freezing, I’ll fill them with hot water and put them in a wool sock.